
1/1/13
Well once again I have been tardy in uploading progress reports - due in part to a hectic work schedule and the purchase of a house with a bigger garage and the ensuing move of all my goods and chattels - a large part consisting of what many consider to be junk but I see as diamonds in the rough.
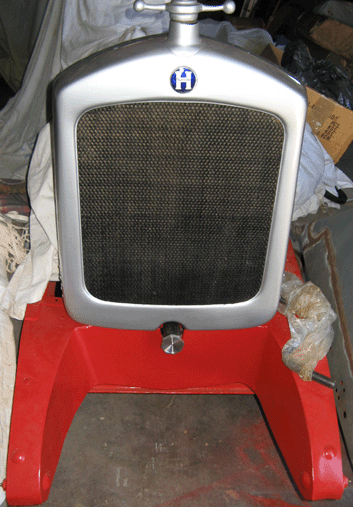
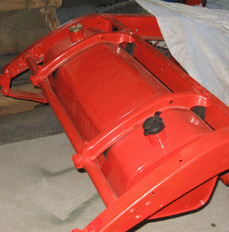
Part of the philosophy for the move was "if its ready then bolt it on" to avoid moving a myriad of separate components. This didnt quite go as far as planned and we only managed to get the radiator and fuel tank fitted up along with some splash pans & aprons.
The radiator core was the better one from the spares collection and required some minor leak repairs and a good flush out with a lot of steaming hot water. The surround itself didn't appear to be in too bad a condition so it was sent off to A Class metal finishers for chemical stripping of the old plating before the required repairs took place. One we had it back, there was a lot of heavy pitting at the base that would have needed a lot of time and expertise to remedy before it was replated so a decision was made to repair the necessary and give it a painted finish. The spare tank recieved a POR15 tank clean and seal kit to its internals plus a lick of paint to the outside and was fitted up. This revealed a difference between this unit and the original rotted one from the car - the external circumference was slightly smaller requiring a modification to the securing straps. Obviously Hupp changed the fuel capacity at some stage causing this. I was aware of a change from round tanks to this shape occuring around late 1922 / early 1923 but assumed that they remained the same from then to the end of the model run. The splash pan under the engine is a repaired original whilst the front apron is a quick knock up from some scrap metal we had laying about.
Now it is in its new home it will start to have a body built up for it from the very sad scraps that remain. This will be a major challenge of ingenuity and patience! Unfortunately an update on this will be some way off whilst shed and house get sorted out.
10/2/13
Well I have settled in and starting to get on with thngs - a lot still to do as far as organising the shed goes but you need time out to play too!
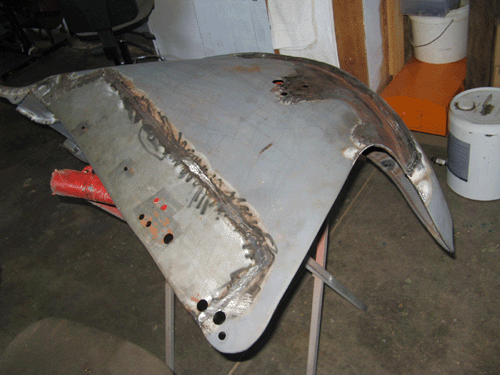
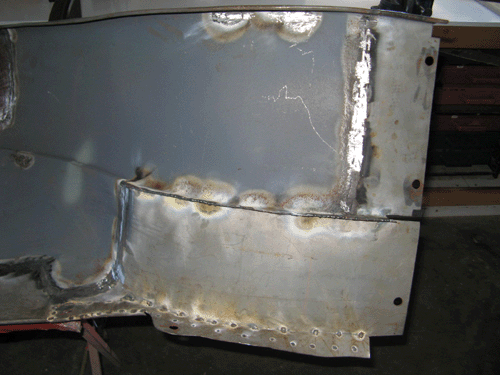
As indicated last installment what remains of body there is for this car is in sad condition indeed and this installment could be subtitled as "A tale of manky metal". Not a lot came home from the sandblaster - I was sure I dropped off a pair of mudguards but what I got back looked like it was picked up ater a car bombing in Kabul! Big sections had simply dissapeared and what was left didn't resemble anything in the known universe that came from a car. Foolish me neglected to take a photo of the mess!
Undaunted and having another car for reference, large sections were fabricated and welded into place. The bulk of this on both guards was where they bolt up to the chassis rails and the running boards as you should be able to see in the photos at left. Total weld length on both guards ran to 5.7 meters. The drivers side unit was the better one and only needed the above mentioned repais. The passenger side was another story as it had at some stage prior to being blown up in Kabul, hit something very solid and had some bush repairs done by someone without any knowledge or skills for the job. Most of the top edge from approximatey midpoint to the front lip got cut away and replaced to overcome many pinholes, cracks, seam damage and dodgy welding. This had the desired effect of pulling it nicely back to shape. There is going to be the inevitable amount of plastic filler go into these to smooth out the welds and bash marks. But at least I will have front mudguards fitted up in the near future.